Running Multiple Recording Units with PowerChrom
This application note outlines how PowerChrom software can be used to operate multiple PowerChrom or e-corder recording units on a single Windows PC.
Contents
Introduction
Multiple copies of PowerChrom software can be installed on a single computer to collect data from multiple PowerChrom or e-corder recording units simultaneously. This feature reduces the number of computers required in a laboratory with multiple chromatographs in close proximity, freeing valuable bench top space. The chromatograms collected from each recording unit are displayed in separate windows. Settings can be changed for a particular recording unit by selecting its corresponding PowerChrom window.
For practical operation we advise a maximum of four recording units connected to the one computer. However more could be operated depending on your computer’s memory and the number of USB ports available. One or two channels of data can be recorded per recording unit.
Software Requirements
PowerChrom v2.5.4 or later is required to operate multiple recording units from the one computer. If you were supplied with an earlier version of PowerChrom, the latest version can be downloaded from Software Downloads. The license number on your original PowerChrom Installer CD will unlock the new version.
Steps to use Multiple Recording Units
- Run the PowerChrom Installer for each of the recording units that are to be used, saving the files in separate directories. Multiple PowerChrom shortcut icons should appear on the desktop. It is a good idea to lable the icons with unique names. A different license number is required to run each copy of PowerChrom installed.
- Connect recording units to each of the available chromatographs in the normal manner. See the PowerChrom or e-corder hardware manuals on their respective installer CDs for more information.
- Plug recording units into the available USB ports on the computer and turn one of the units on.
- The first time a new recording unit is used, you will be prompted to install a driver for each unit. When prompted by Windows, insert the recording unit’s installer CD into the CD tray. The USB drivers should be installed automatically.
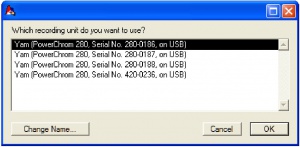
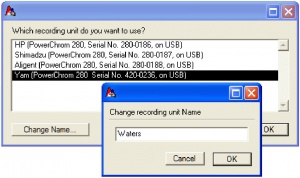
- Double click on one of the PowerChrom shortcuts to launch PowerChrom. A window will appear asking which recording unit you want to use (Figure 1). Each unit will have the default name “Yam”, however individual units can be identified by the listed serial numbers which correspond to the serial number on the back of the recording unit. Click on the “Change Name” button if you wish to identify each recording unit by a unique name (Figure 2). These new names will be recognised by PowerChrom when units are re-connected in the future.
- Select a recorder. PowerChrom’s “Easy Access” window will appear as normal.
- Select the recording parameters you wish to use to collect data from the chromatograph. At this stage it is a good idea to save the PowerChrom file with a name that will help identify which recorders controls are active in the future.
- To operate a new recording unit, double click on one of the other PowerChrom shortcuts. The recording unit selection window will appear again (Figure 1) listing the available recording units. Select another recording unit and set up the recording parameters for this unit.
- Repeat Step 8 for each additional recording unit you wish to collect data from.
Switching Recording UnitWwindows
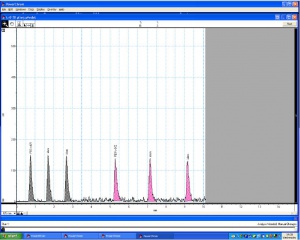
By default the main PowerChrom window for each recording unit will be stacked (Figure 3), with the PowerChrom window for the last recorder selected on top. Windows for the other recording units can be brought forward by toggling through the PowerChrom buttons in the task bar. The menu items and controls are made active for the window on top. With the PowerChrom window active, you can initiate data recording from the corresponding recording unit in the normal manner.
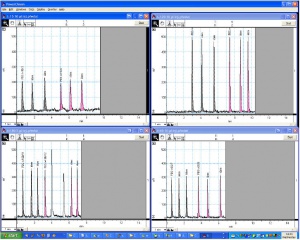
The PowerChrom windows can also be resized so that all chromatographs being generated can be monitored in real-time (Figure 4). All inactive windows will have a dimmed title bar. The scrolling of the active window will be smoother than the scrolling of the inactive windows, however this does not affect data being recorded to file. To alter the settings for a particular recording unit, click inside its corresponding PowerChrom window. The commands will be made active for the recording unit corresponding to this window.


